OneDrive APP
Benefits and Precautions
The advantage is that the administrator is only authorized to log in once, and the same is used when adding parameters later. When adding, everything is the same except for the mailbox.
- For example, E5 has 25 5T accounts. After you log in and initialize in advance, you can directly use the parameters before the CV. You don’t have to get the refresh token every time as before, and it will expire after a long time
- A1, A1P, etc. can distribute more accounts (500 - unlimited)
After the administrator authorizes in this way, he can view the account of each member in the organization at will, which will leak his own files
- It is recommended to apply for OneDrive E5 to get better
Tips
It is not applicable to the home version. If you are in the configuration process, it does not match the options that appear in the tutorial. It may not be supported
First log in with your personal or organizational account
Login to get our
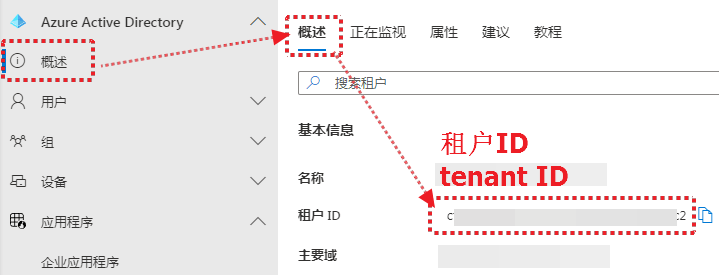
Create process
Read the precautions carefully
Please read carefully the following serial numbers , view in sequence , if there is any error, please feedback in time
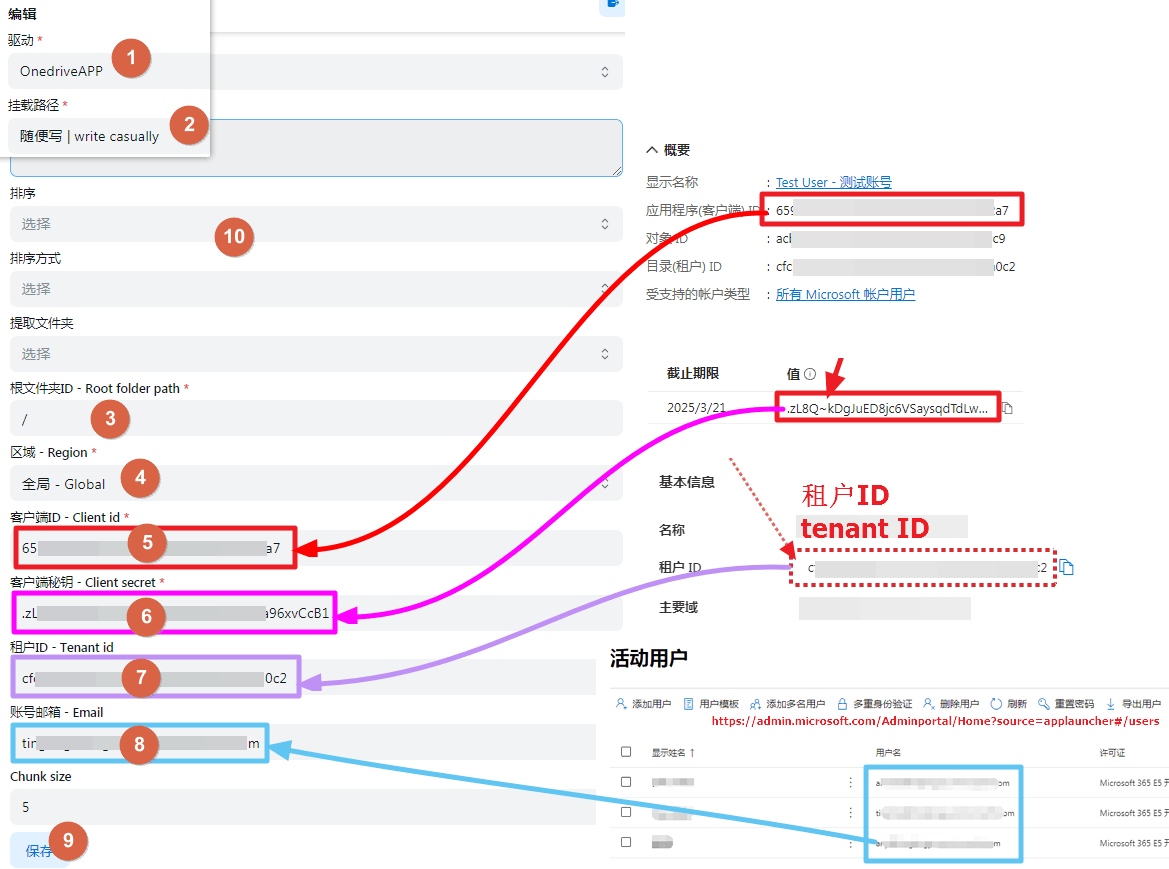
Fill in the example
Fill in the values obtained in the above process one by one. If you don’t know which email address it is, you can find it by view all users of the organization
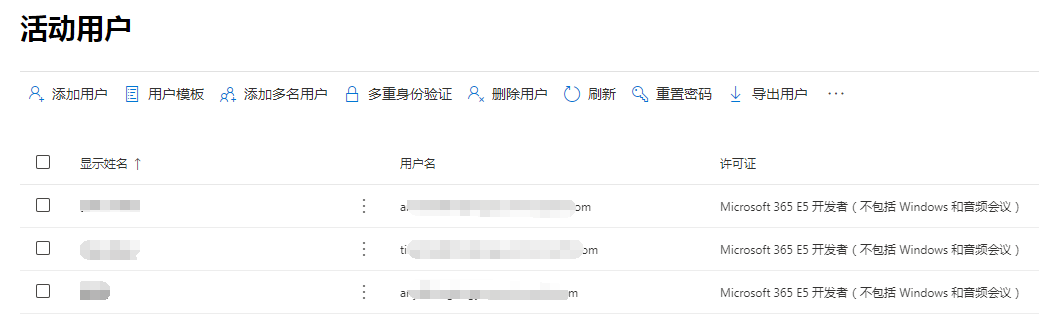
View all users of the organization
If you don't know how many users there are in your OneDrive organization, you can go to the link below to log in to the admin account to view
https://admin.microsoft.com/Adminportal/Home?source=applauncher#/users
Error message
- Tips:Either scp or roles claim need to be present in the token Error
because you didn't do it in step 4 caused by,Pay attention to the tips below the fourth step
- Tips:failed get objs: failed to list objs: Unable to retrieve user's mysite URL Error
The newly created OneDrive user account does not take effect in real time, Delay takes effect, wait for a few hours and try again Case
Add OneDrive_App accounts in batches
software used:https://github.com/yzbtdiy/alist_batch
Fill in the parameters. If you don’t understand, you can watch the video below.
Do not leave blank lines in the two configuration files, as this will also report an error
config.yaml
# Your own OpenList site, which can be local or remote server IP or domain name, but cannot have "/" at the end
url: ALIST_URL
# The three parameters of auth are your OpenList administrator account password and refresh token
auth:
    username: USERNAME
    password: PASSWORD
token: ALIST_TOKEN
# enable Turn on whichever option you need, and turn off the one you don’t need
aliyun:
    enable: false
    refresh_token: ALI_YUNPAN_REFRESH_TOKEN
pikpak:
    enable: false
    username: PIKPAK_EMAIL
    password: PIKPAK_PASSWORD
# What we need here is onedrive_app, turn this on
onedrive_app:
    enable: true
# global is global, such as E5 A1 A1P, Vianet is cn, German version is de, American version is us
    region: global
    tenants:
        - id: 1
          client_id: client_id
          client_secret: client_secret
          tenant_id: tenant_id
# Here you can mount different domains and different accounts at the same time, each domain can be written according to the above configuration
# Client ID Client Secret Key Tenant ID Needless to say?
onedrive_app.yaml
# Category 1 Mount x can be changed at will, which is equivalent to the mount path when adding storage
# 1 This refers to which domain/organization configuration in the above configuration file is to be used
# What follows is your email account~ If you don't write ":/folder1", the root directory will be mounted, and if you write it, you will mount this directory
# Anyway, the format is: Mount path: domain/organization: email account: / folder directory (optional)
Category:
    mount: 1:user1@xxx.onmicrosoft.com
    mount2: 1:user2@xxx.onmicrosoft.com:/folder1
    mount3: 1:user2@xxx.onmicrosoft.com:/folder2
# You can mount it in multiple different lists, and write according to the format
Category2:
    mount11: 1:user1@xxx.onmicrosoft.com
    mount22: 1:user2@xxx.onmicrosoft.com:/folder1
    mount33: 1:user2@xxx.onmicrosoft.com:/folder2